Silver light implementation:
The following example shows how you could use Microsoft Silverlight in your Sitecore sites.
- Create a Layout in the Developer center (Silverlight.html). Add a placeholder with the key sl
- Under the root folder of your website create a folder called Silverlight, where we put the required silverlight parts.
- Add to the head section of the layout, two scripts
<head runat="server">
<title>Welcome to Sitecore</title>
<meta http-equiv="Content-Type" content="text/html; charset=UTF-8" />
<meta name="CODE_LANGUAGE" content="C#" />
<meta name="vs_defaultClientScript" content="JavaScript" />
<meta name="vs_targetSchema" content="http://schemas.microsoft.com/intellisense/ie5";/>
<link href="/SdnArchive/default.css" rel="stylesheet" />
<script type="text/javascript" src="/SdnArchive/Silverlight/Silverlight.js"></script>
<script type="text/javascript" src="/SdnArchive/Silverlight/createSilverlight.js"></script>
</head>
CreateSilverlight.js: In the Visual Studio templates, this file is named TestPage.html.js. This JavaScript file contains one method with no parameters, called createSilverlight. This method is a template within which you can call the createObject or createObjectEx method, both of which are defined by Silverlight.js. Specific parameters passed to createObject (or packaged parameters to createObjectEx) specify the Silverlight plugin's size on the HTML page and reference the XAML markup file that contains the Silverlight UI definition. Because the method parameters change for each application (for instance the name of the source XAML file), each Silverlight-based application typically has a unique CreateSilverlight.js file.
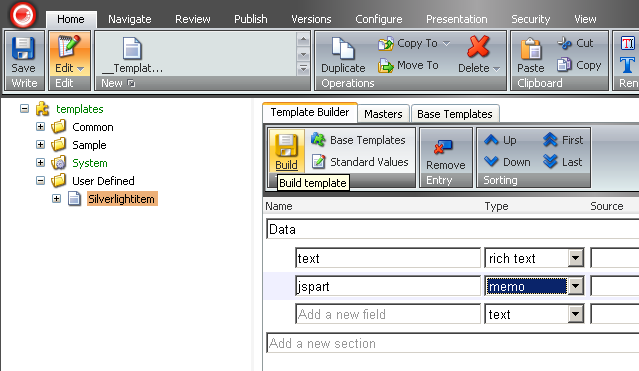
Silverlight.js: This JavaScript file defines the createObject and createObjectEx methods that you call from CreateSilverlight.js to instantiate the Silverlight control in the HTML page. It also provides code to handle the client user experience if the Silverlight control is not present. You host this file on your site, and as per the License Agreement, you cannot modify its contents (review the License Agreement in the Silverlight SDK for details). If you write your own JavaScript code for your application, you must add this code to a different script file. Create the template SilverlightItems. The required fields are:
- A Richtext field, we named our field “text”
- A Memo field, we named our field “jspart”
-
Create the rendering jsout.xslt and assign it to the layout silverlight.html
Add to the rendering the following lines
<script>
<xsl:value-of select="sc:fld('jspart',.)" disable-output-escaping="yes"/>
</script>
-
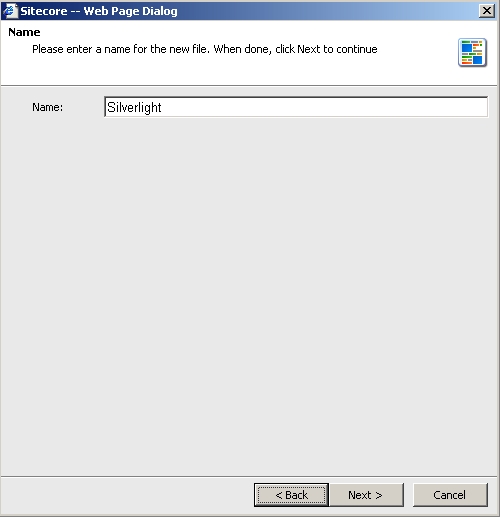
Create an item from the SilverlightItems template (Silverlight test).
-
Goto the presentation and assign to the Silverlight item, the layout, sample rendring.xslt and jsout.xslt through the placeholder(key=sl)
So our item should be like this(if you have followed the names and steps)
-
Then modify the Silverlight item test fields
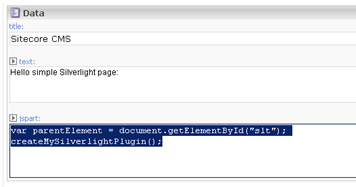
Add to the Rich Text field (text) the text “Hello simple Silverlight page:”.
Then switch to HTML mode and add the container for our future silver light object. I propose to use the <div> element.
So our field in HTML view looks as follows;
<p>Hello simple Silverlight page:</P>
<br/>
<div id="slt"></div>
- Modify the memo field (jspart).
Here, we need to add a call to the script function that creates the Silverlight object.
Our fields looks as follows;
-
Create an xaml file (myxaml.xaml) and add the following code
<Canvas xmlns=http://schemas.microsoft.com/client/2007 >
<!-- Linear gradients -->
<Rectangle Width="140" Height="70" Canvas.Left="10" Canvas.Top="10">
<Rectangle.Fill>
<LinearGradientBrush>
<GradientStop Color="Yellow" Offset="0.0" />
<GradientStop Color="Red" Offset="0.25" />
<GradientStop Color="Blue" Offset="0.75" />
<GradientStop Color="LimeGreen" Offset="1.0" />
</LinearGradientBrush>
</Rectangle.Fill>
</Rectangle>
<Rectangle Width="140" Height="70" Canvas.Left="155" Canvas.Top="10">
<Rectangle.Fill>
<LinearGradientBrush StartPoint="0,0" EndPoint="1,0">
<GradientStop Color="Yellow" Offset="0.0" />
<GradientStop Color="Red" Offset="0.25" />
<GradientStop Color="Blue" Offset="0.75" />
<GradientStop Color="LimeGreen" Offset="1.0" />
</LinearGradientBrush>
</Rectangle.Fill>
</Rectangle>
<!-- Radial gradients -->
<Rectangle Width="140" Height="70" Canvas.Left="10" Canvas.Top="110">
<Rectangle.Fill>
<RadialGradientBrush>
<GradientStop Color="Yellow" Offset="0.0" />
<GradientStop Color="Red" Offset="0.25" />
<GradientStop Color="Blue" Offset="0.75" />
<GradientStop Color="LimeGreen" Offset="1.0" />
</RadialGradientBrush>
</Rectangle.Fill>
</Rectangle>
<Rectangle Width="140" Height="70" Canvas.Left="155" Canvas.Top="110">
<Rectangle.Fill>
<RadialGradientBrush GradientOrigin="1,0">
<GradientStop Color="Yellow" Offset="0.0" />
<GradientStop Color="Red" Offset="0.25" />
<GradientStop Color="Blue" Offset="0.75" />
<GradientStop Color="LimeGreen" Offset="1.0" />
</RadialGradientBrush>
</Rectangle.Fill>
</Rectangle>
</Canvas>
-
Put this file into the scripts ( Silverlight folder and root).
-
Save the changes to all renderings, layouts and items.
-
Publish(mode=smart, or full)
-
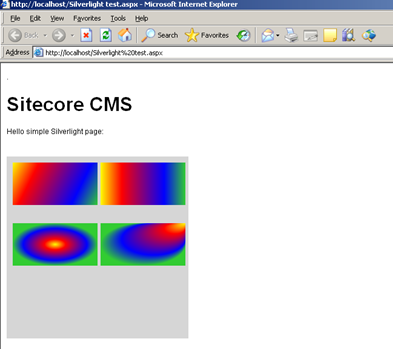
Type in your browser http:// host name// Silverlight test.html
And you should get the following output
-
So, in this example we show how to create a simple Silverlight page using Sitecore CMS.
Listed below is the code for the createMySilverlightPlugin() function
function createMySilverlightPlugin()
{
Silverlight.createObject(
"myxaml.xaml", // Source property value.
parentElement, // DOM reference to hosting DIV tag.
"slt", // Unique plug-in ID value.
{ // Per-instance properties.
width:'300', // Width of rectangular region of
// plug-in area in pixels.
height:'300', // Height of rectangular region of
// plug-in area in pixels.
inplaceInstallPrompt:false, // Determines whether to display
// in-place install prompt if
// invalid version detected.
background:'#D6D6D6', // Background color of plug-in.
isWindowless:'false', // Determines whether to display plug-in
// in Windowless mode.
framerate:'24', // MaxFrameRate property value.
version:'1.0' // Silverlight version to use.
},
{
onError:null, // OnError property value --
// event handler function name.
onLoad:null // OnLoad property value --
// event handler function name.
},
null);
}
For more information about Microsoft Silverlight please see the Microsoft Silverlight portal at;